Love building with Lego–or live with someone who does? Then creating a Lego locker is the perfect DIY project for you to tackle! Keep reading for our step-by-step tutorial.
Gather Your Materials
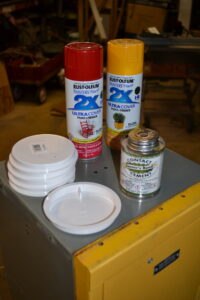
First, gather all of the materials you’ll need:
- 1 small used locker. We suggest using a single-tier or double-tier locker, or better yet a kids locker. (The one we used is 4 feet tall.) The color doesn’t matter because you’ll be painting it, but make sure it has flat doors and sides.
- Approximately 16 4-inch PVC knockout caps. You may need more or less depending on the size of your locker.
- 2-3 cans of spray paint
- Masking tape
- Liquid contact cement
Prep Your Locker
Hammer out any dents and sand rusty spots or areas where the paint is chipped. *Don’t sand hard enough to remove all of the paint, just get the spots with chips, rust, or residue.*
Take off number plates or anything else you don’t want on the completed locker.
Attach the Lego Pegs
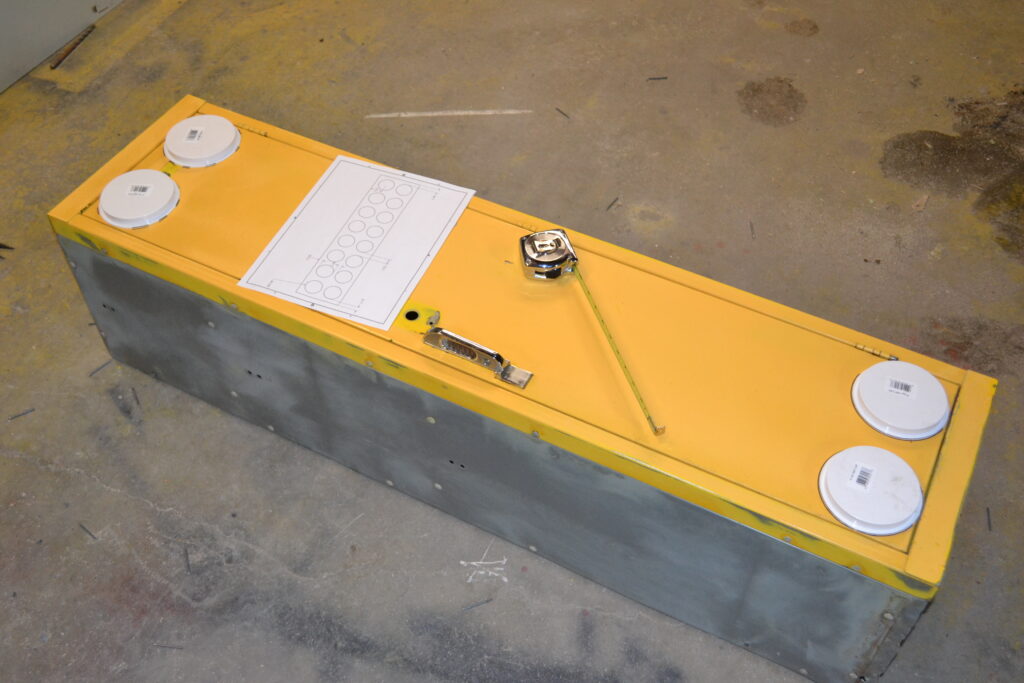
First off, decide how many pegs (AKA PVC knockout caps) you need and how you want to lay them out. The locker in our demo is 1-foot wide by 4-feet tall and we split it into two Lego bricks, each having eight pegs. The pegs need to fit completely on the locker door, so start off by placing a peg in each corner of the door with the outside edges of the pegs tight against the edges of the door. Measure the halfway point of the locker and draw a light line so you can make sure your bricks will be the same size. Evenly space out your pegs onto each brick. Once they’re placed where you want them, draw a circle around each one with a pen or Sharpie. *Limit your marks if you’re using a Sharpie–spray paint doesn’t cover Sharpie super well.*
Now it’s time to glue the pegs on. Liquid contact cement is a good choice because it’s cheap, strong, dries fast, and dries clear. Put thin coats on both the edges of each peg as well as the locker door where the pegs will be attached. Let the cement get a little tacky before sticking the pegs on. You can alternate coating one peg, then the door, then another peg and the timing should be just about right for gluing the first peg to the door. Keep going until all the pegs are attached.
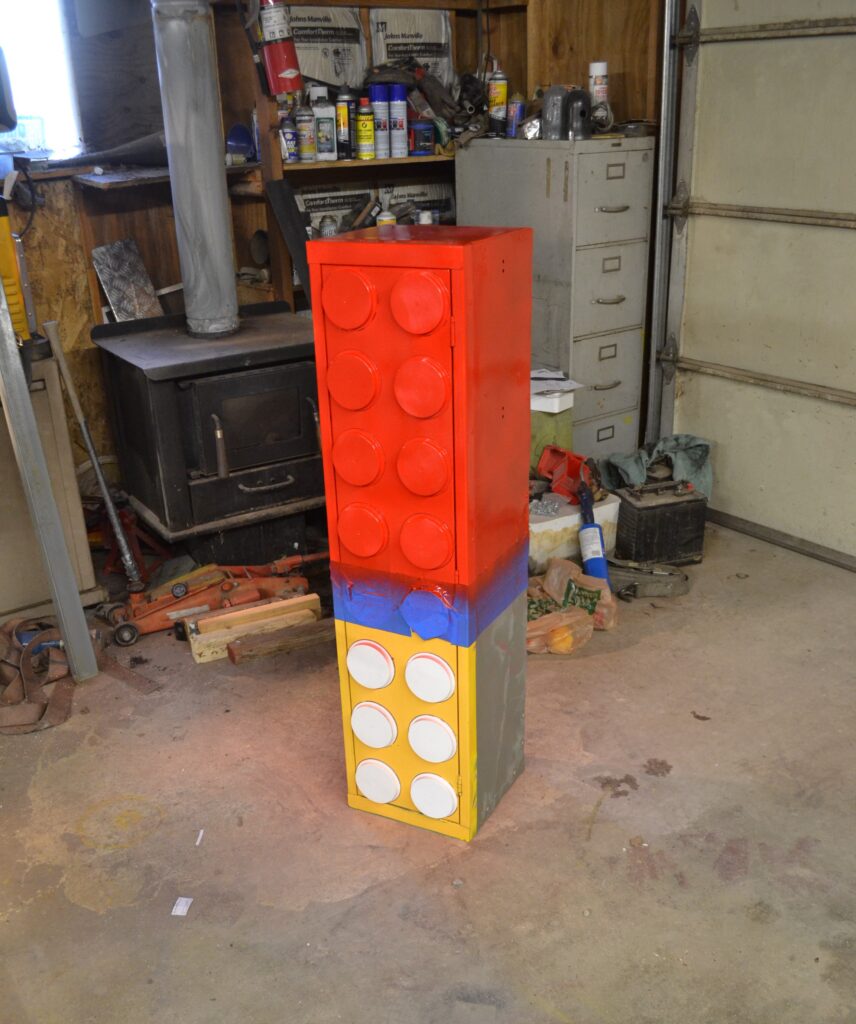
Paint Your Locker
Now it’s time to paint! We suggest using Rustoleum 2x Spray Paint with Primer because it gives good coverage and you don’t need to prime first. We used a gloss finish so our finished Lego locker would look just like those shiny Lego bricks. Two or three coats should be enough, but if you chose a lighter paint color you may need to do more.
Other tips:
- If you’re using multiple colors, use masking tape to create a clean line between your “bricks”.
- Paint the top brick first in case the paint runs.
- Wait 20-30 minutes in between coats of the same color, but let the final coat dry ideally overnight before starting on a different color.
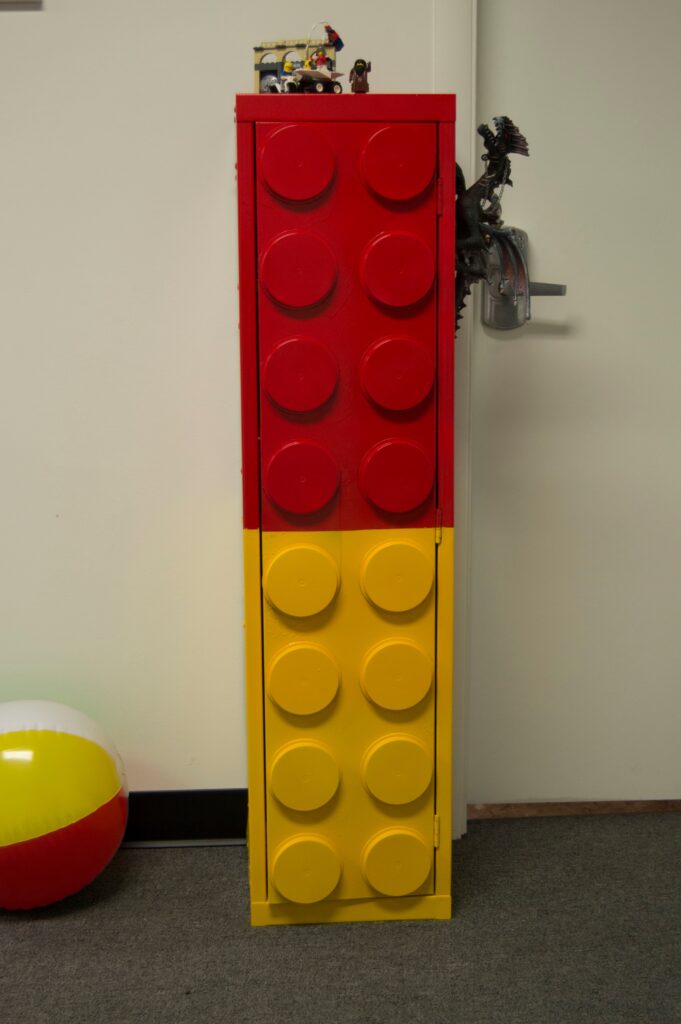
Enjoy Your New Lego Locker
And there you have it! A DIY Lego Locker for your favorite Master Builder. This would be a fun storage solution in a bedroom, play room, or game room. Where would you use one in your home?